Send smart campaigns using Recommend – Part 1
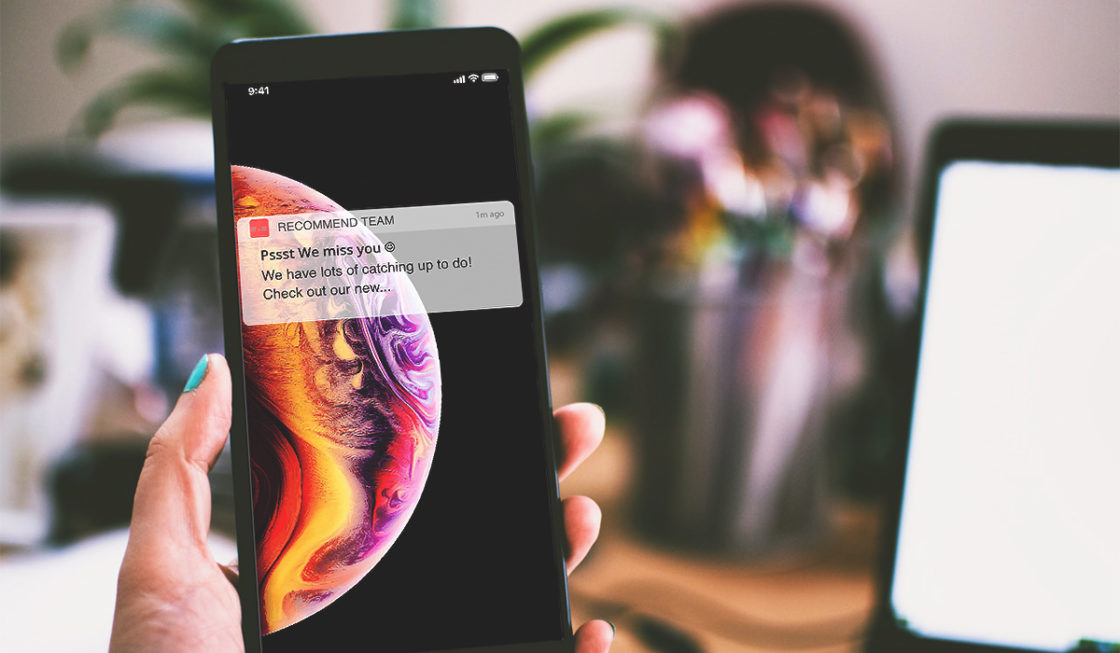
E-commerce personalisation goes beyond merely using the name of a registered customer at the beginning of an email. It’s a unique experience achieved by showing the customers specific content and product recommendations. With our smart campaigns, you can send targeted messages based on their browsing history, purchase background, demographics and unique traits.
Personalisation helps improve the relationship with customers and the opinion they have on a brand. Personalisation helps in reducing acquisition costs by up to 50%, raising revenues by 5% to 15%, and increasing the efficiency of marketing spending by 10% to 30%.
How to start enjoying the benefits of personalisation? By sending smart campaigns and customised content to your customers using Recommend. Let’s set up your domain and email address to start creating your first campaign:
Custom Domain and Email Verification
Recommend uses AWS (Amazon Web Services) SES (Simple Email Service) to send transactional emails and marketing communications on your behalf. However, before sending any message to your clients, you need to set up your custom domain and/or email address. To clarify, the verification of both is not mandatory.
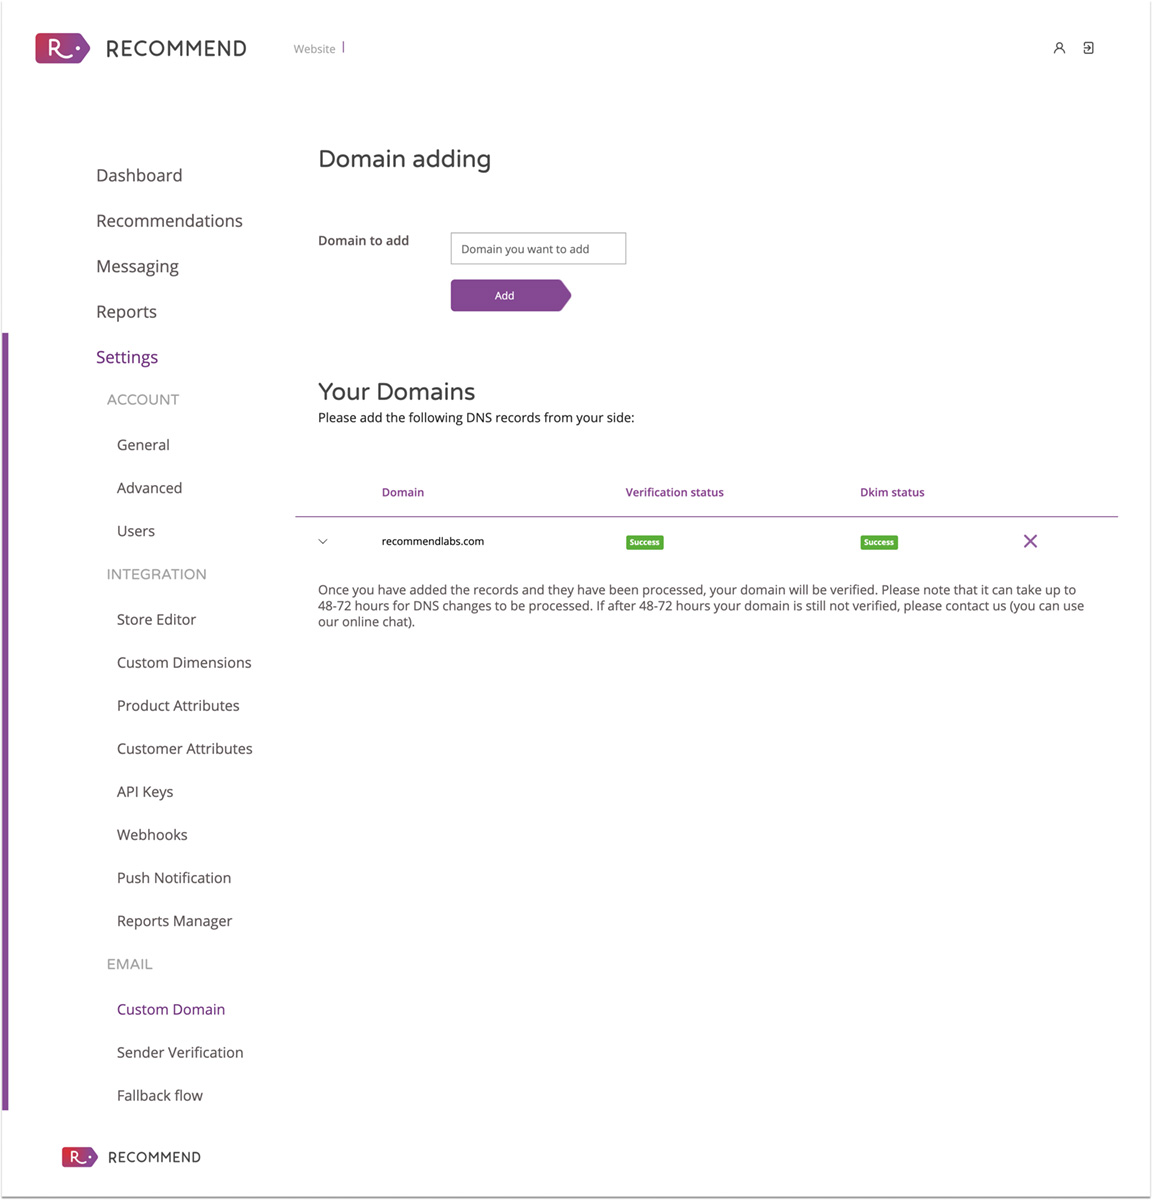
Firstly, go to settings and click on ‘Custom Domain’. Here you need to write the domain of your website. Secondly, it is necessary to add records that have appeared under your domain. After that, the verification process can take up to 48-72 hours. If after that time, your domain is still not verified, please contact us. We suggest having this step in place before start using the Smart Campaigns.
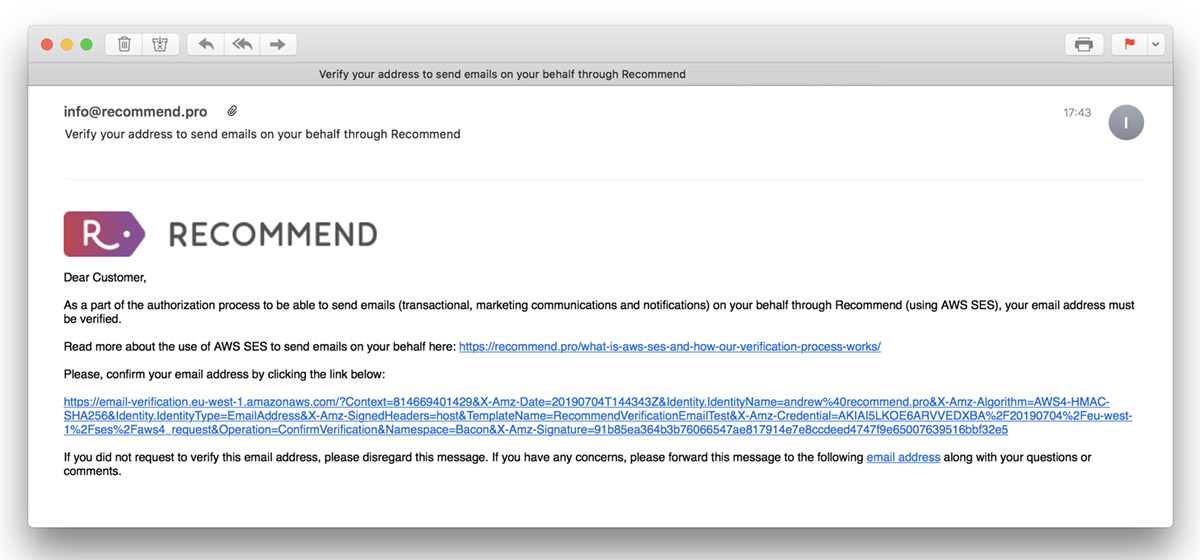
In addition, to verify your email address, click on ‘Sender Verification’ and write it down. Similarly, it has to be a work email associated with your website domain. This email will appear as the ‘sender’, and it is the email address used by the platform to send communications on your behalf to your clients.
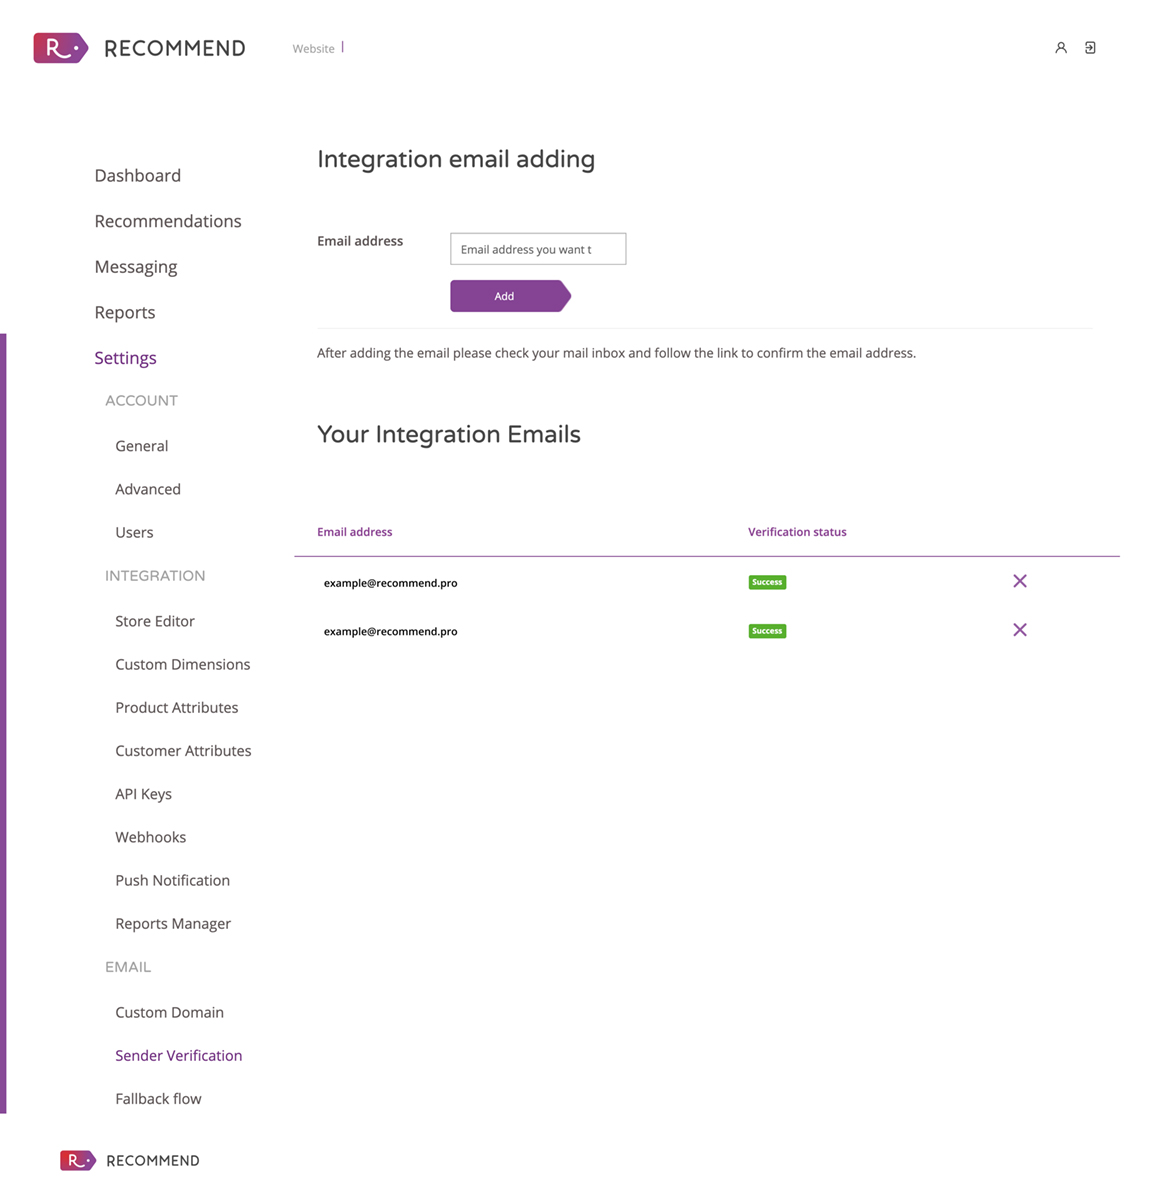
Immediately after adding the email address, a verification email will be sent to that address to confirm that everything is correct. Check your inbox and click on the link there to continue with the setup process.
Integrations – Push Notifications
Push notifications are short pop-up messages that the customers receive on their smartphones. The mastery of push notifications is that they can reach consumers anytime, anywhere. Most importantly, they have 2 to 4 times better CTR than emails, and they can help to increase your conversion rate up to 2%. One of our strongest assets within the Smart Campaigns feature.
To set up push notifications, go to Dashboard > Integration > Push Notification, choose any of the platforms available (iOS, Android or Web), and follow the instructions:
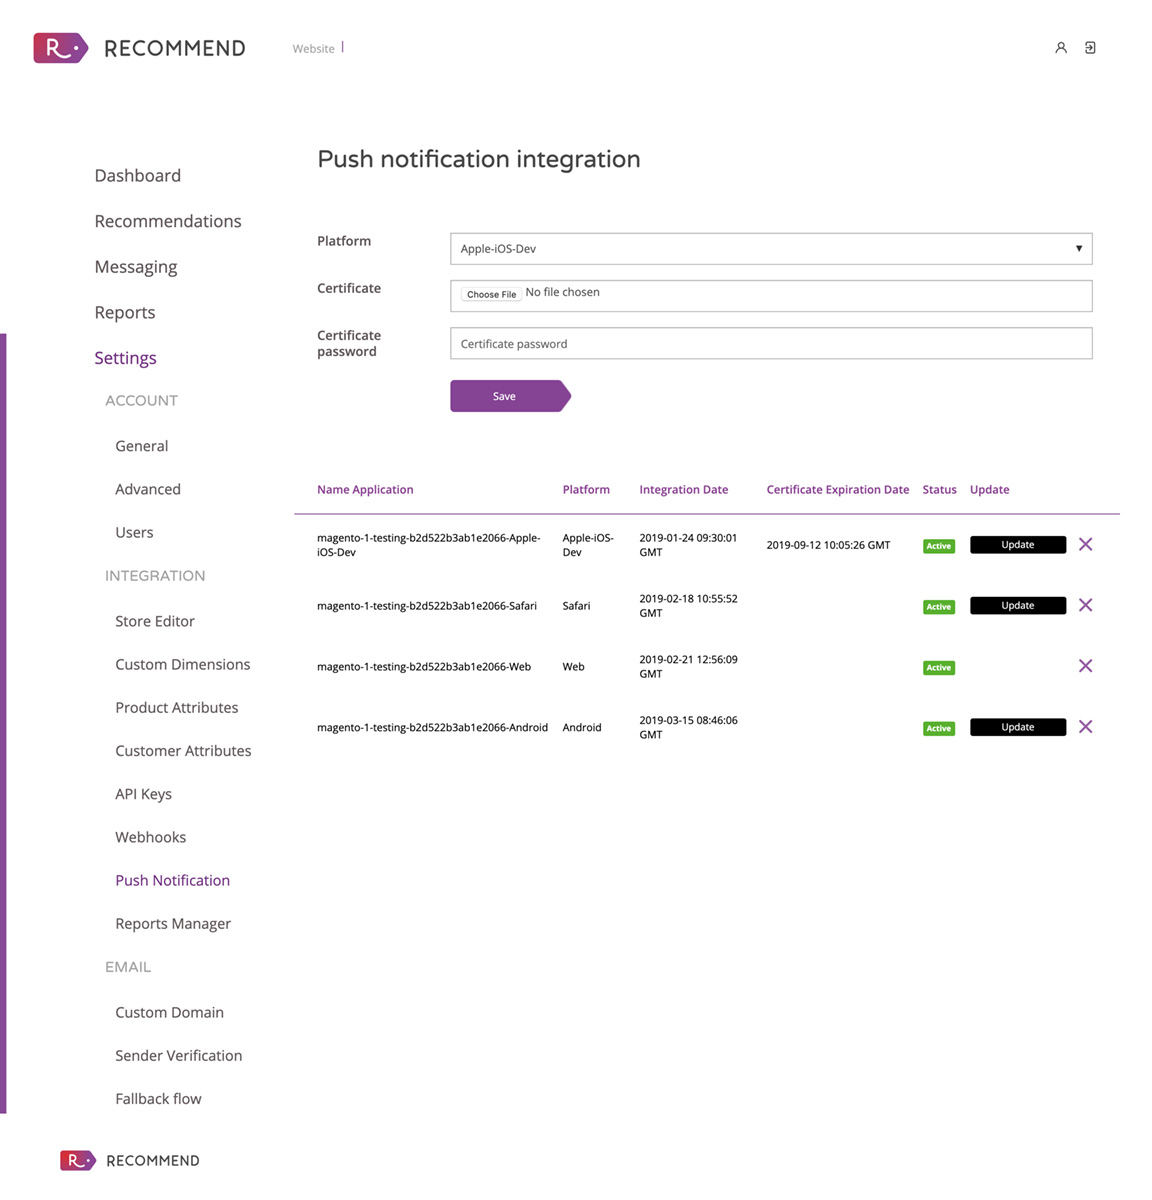
After completing all the steps, you are ready to start sending more relevant and personalised communications to your customers.
Now you have your domain and/or email setup. Now it’s to see how to create templates and custom events:
- The templates are for your Marketing communications (transactional emails and push notifications).
- Custom events will help your brand to target the right audience based on their behaviour while visiting your website.
Improve your email marketing strategy with Recommend
According to SaleCycle, 59% of consumers say marketing emails influence their purchase decisions. Likewise, browse abandonment emails have an 80.9% higher open rate and a 50.5% higher click-through rate than traditional emails. In other words, with Recommend and the Smart Campaigns, you have the option to personalise your communication by creating templates for your emails and push notifications.
Add Email Template
To access this section, go to your Dashboard > Messaging > Templates, and click on ‘Add Email Template’.
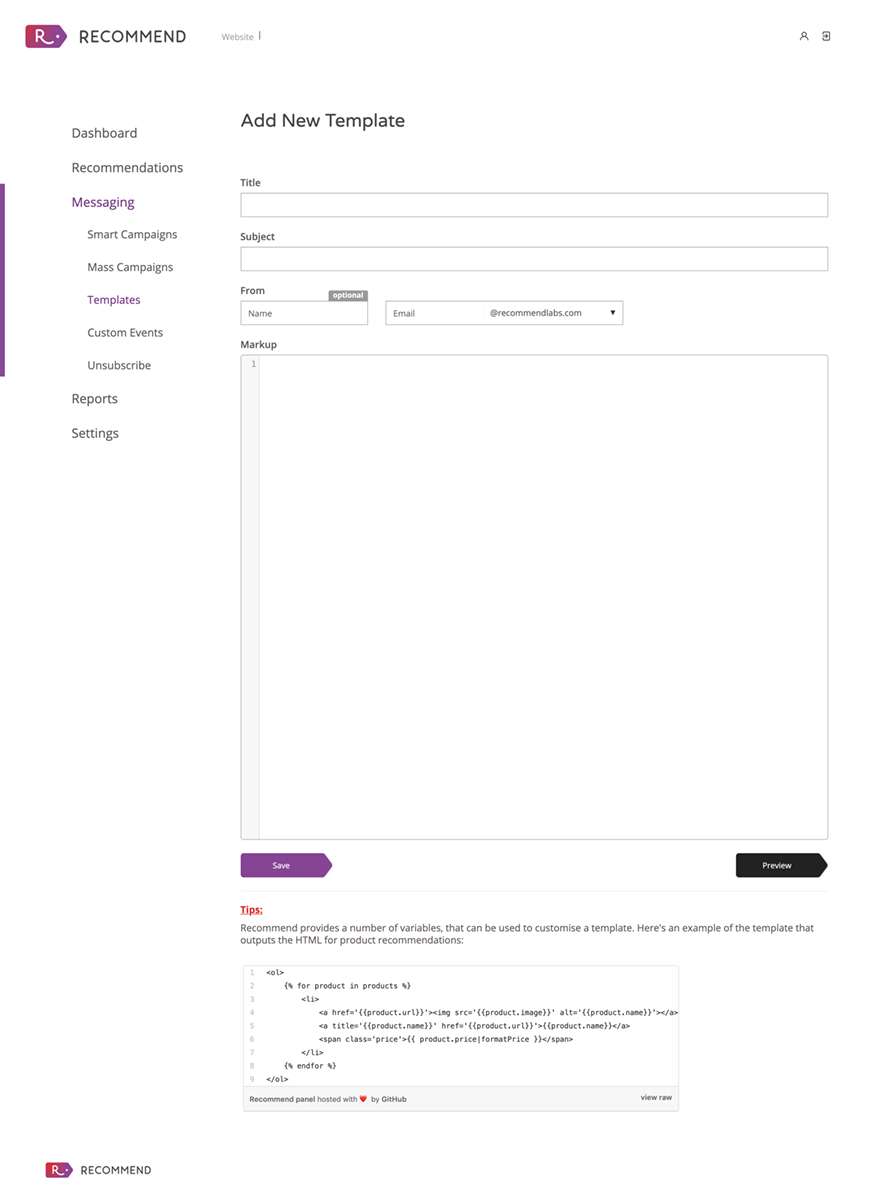
- Title: This is for internal use to identify your templates. Don’t forget to add any term that indicates the content of the template.
- Subject: This is visible for your customers. Be concise, use action-oriented verbs and avoid making any false promises. Remember to include personalisation tokens and emojis.
- From: Here will appear the email that you set up before (explained here), including a name, is optional.
- Markup: The content of your email goes here. It has to be coded with HTML. Take advantage of our panels and include some of them in your email communications. Transactional emails are a good place to have product recommendations and personalised content that resonates with a user.
- To add panels, insert the widget within the code and use the panel ID to identify it.
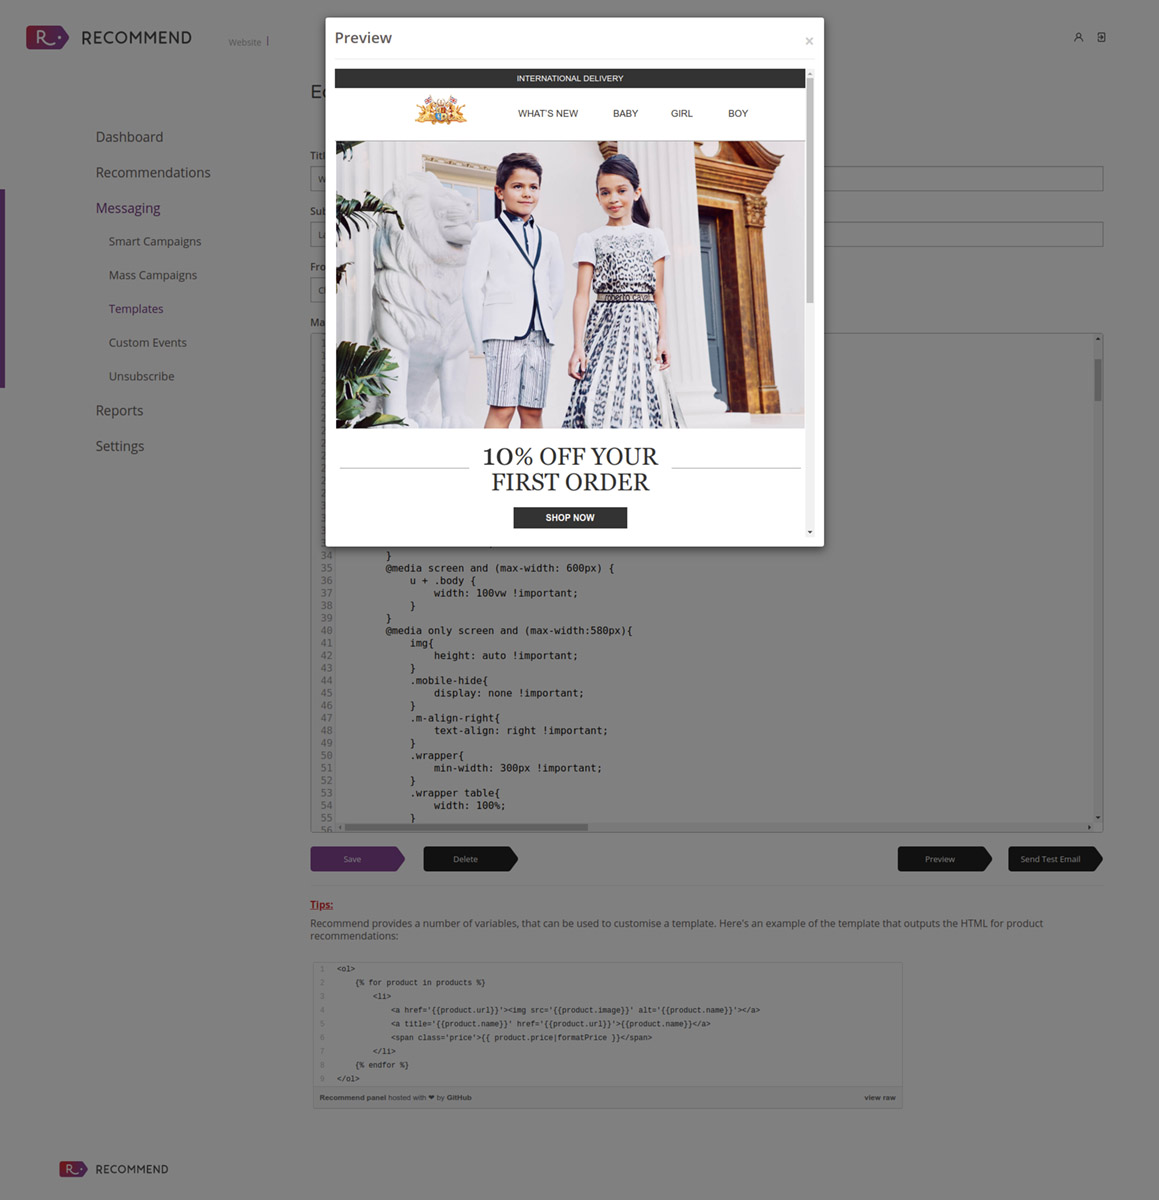
- To see how the email is going to look just hit ‘preview’. If you are ok with it, click on ‘save’.
Benefits of using push notifications
The numbers of mobile users and smartphone owners have increased exponentially in recent years. As a result, 50% of smartphones users grab their smartphones as soon as they wake up. According to a study by Localytics, 52% of smartphone users have push notifications enabled on their devices. That is to say, these short messages can show up to 40% CTRs and help to increase user engagement by up to 80%.
Add Push Notification Template
To create a new template for push notifications, just click on ‘Add New Push Notification Template’:
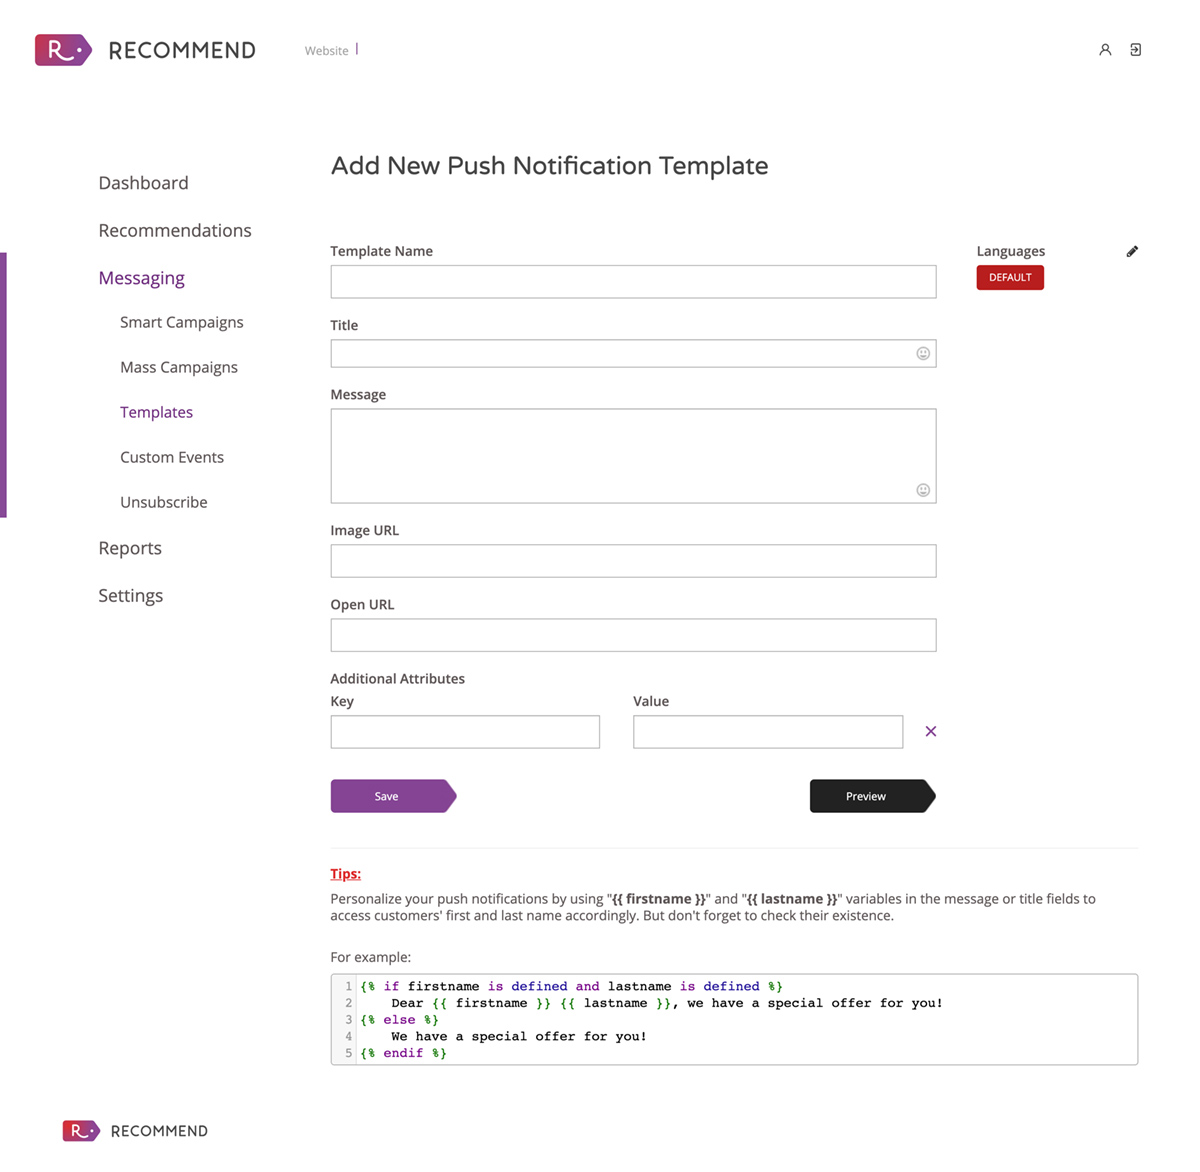
- Template Name: This is for internal use to identify your templates. Don’t forget to add any term that indicates the content of the template.
- Title: This is visible for your customers. Be concise and short, use action-oriented verbs and include personalisation tokens and emojis.
- Message: Keep it concise and short. Tell your customers what they need to do straight away. You can use emojis here too.
- Image URL: You can use an image instead of text. You need to upload the image into your web server and copy/paste the destination URL here
- iOS: Maximum possible dimensions are 1,038 pixels x 1,038 pixels.
- Android: Keep images between 800 and 1,038 pixels wide.
- Open URL: To send your customers back to your website or any of your social channels, copy/paste the destination URL here.
- Additional attributes (Key and Value): These are tracking parameters.
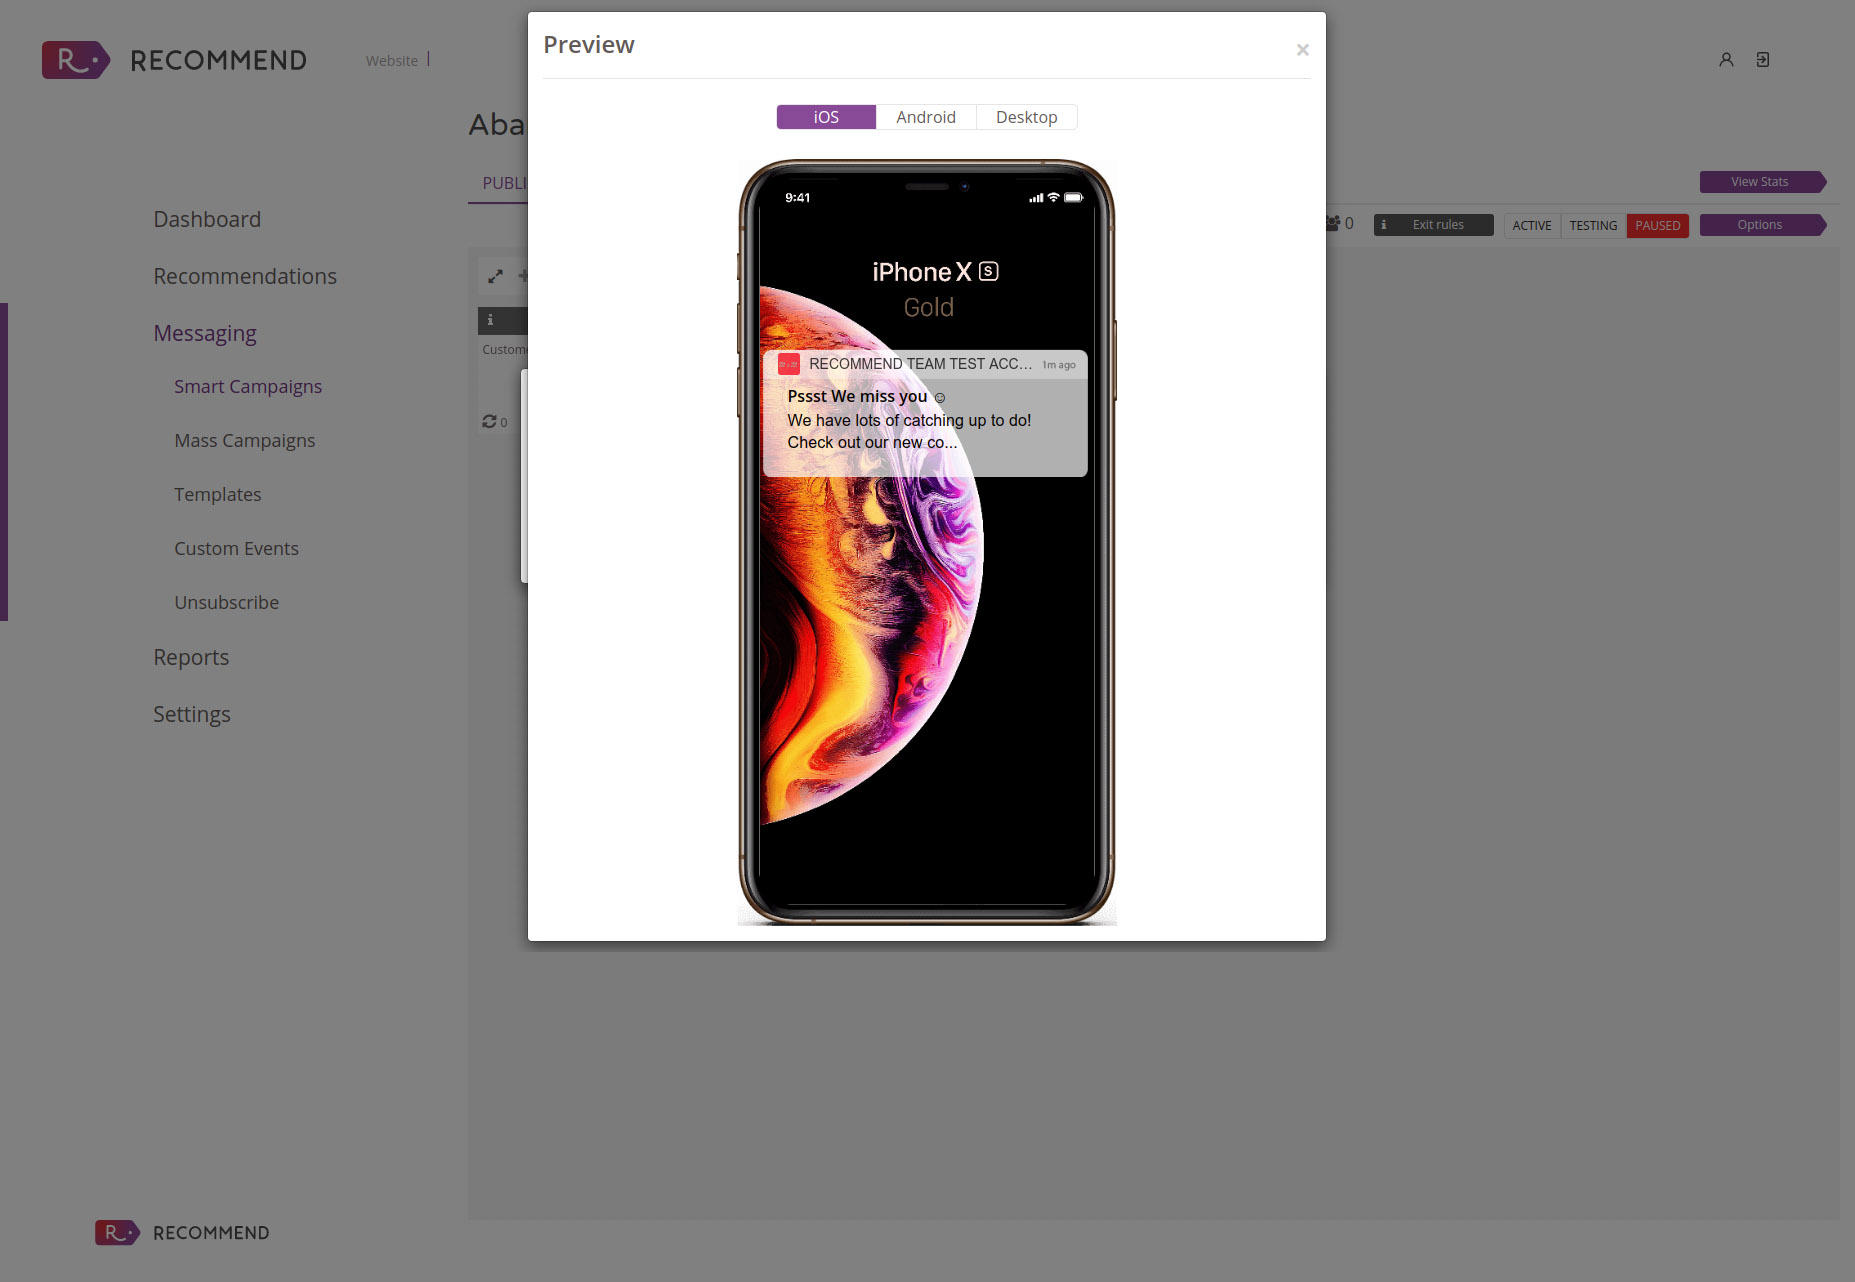
- To see how the email is going to look just hit ‘preview’. If you are ok with it, click on ‘save’.
