Send Smart Campaigns with Recommend – Part 2

Personalisation is essential for your eCommerce business. By using our smart campaigns feature you can reach your customers at the right time and with the right content for them. Either email marketing campaigns or push notifications campaigns are proven to help improve the conversion rate and to drive traffic and sales.
Creating your first campaign in Recommend
Now that your domain and/or your email address are all set up, and you have created at least one template for a transactional email or a push notification, it’s time to create your first campaign. Go to Messaging > Smart Campaigns and click on “Add New Smart Campaign” to start.

The first thing that you will see is a workspace to create your flowchart. There’s a ‘start’ box by default, to help you begin to create your campaign. At the top of the workspace, there’s a button called “Exit Rules.” Exit rules are the opposite of your Start node. Here, you can set events and conditions triggering a customer to exit a campaign.
For example, if you have created ‘cart abandonment’ campaigns, the ‘Exit Rules’ could be ‘Customer has no products in the shopping cart’ or ‘Customer has placed an order’. This way you are telling your campaigns that customers will exit the campaign –meaning that customers won’t receive any unnecessary email or notification– if they have deleted their products from the shopping cart or completed a purchase.

At the right of the workspace, there’s a menu with different options: ‘Actions’, ‘Wait for’, ‘Split’ and ‘Annotations’. To choose any of these actions and to add them to your flowchart, drag and drop into the workspace. To edit any of the boxes, click on the gear on the top left.

“Actions” (Send and End) are to start and end your campaign.
“Wait for” (Delay, Event, Condition) are triggers that let your campaign knows what to do.
- Delay: Based on time and/or dates.

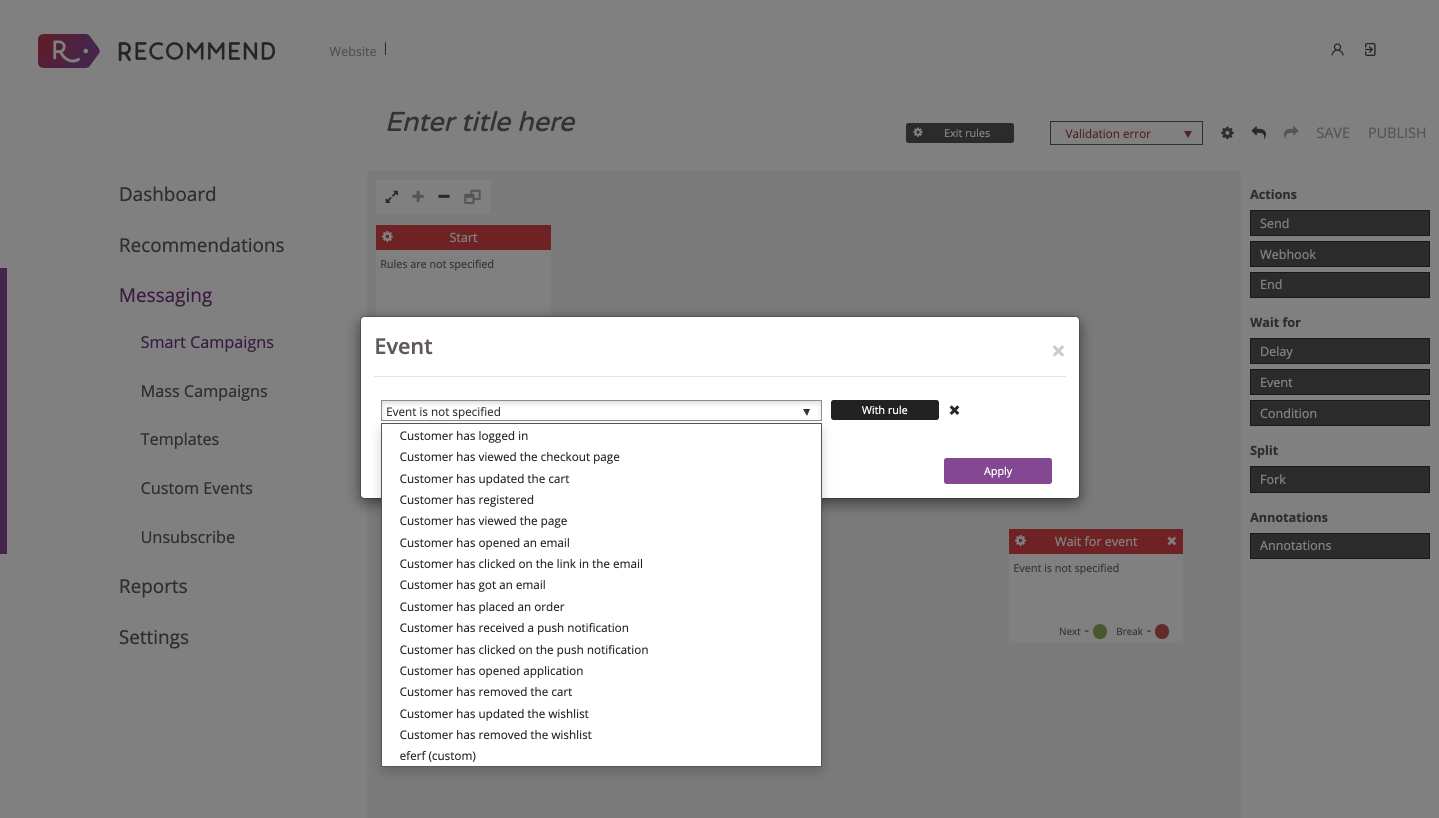
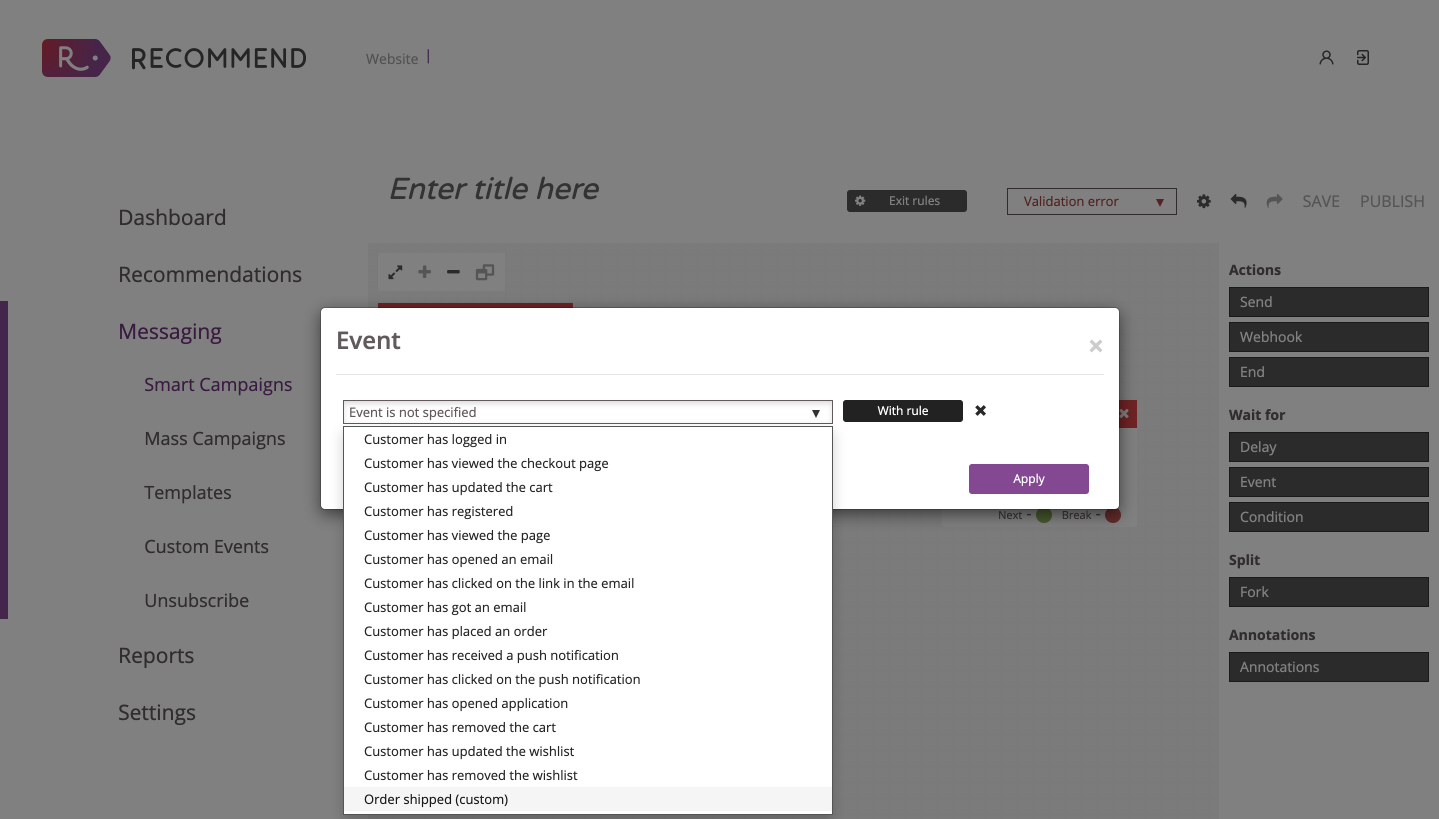
- Events: Any action doing by a customer while visiting your website. From login, update the shopping cart, view a page, receive or click on an email or a push notification.
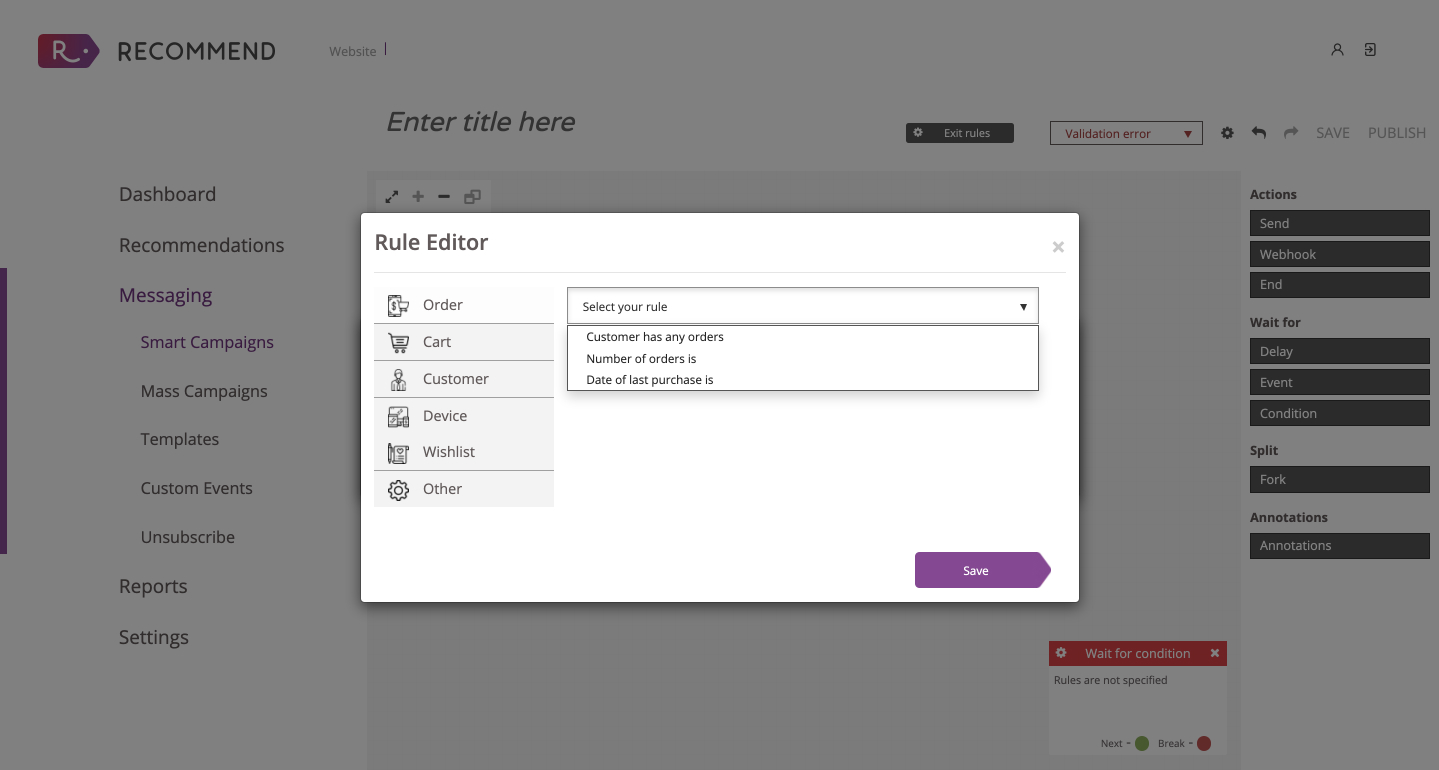
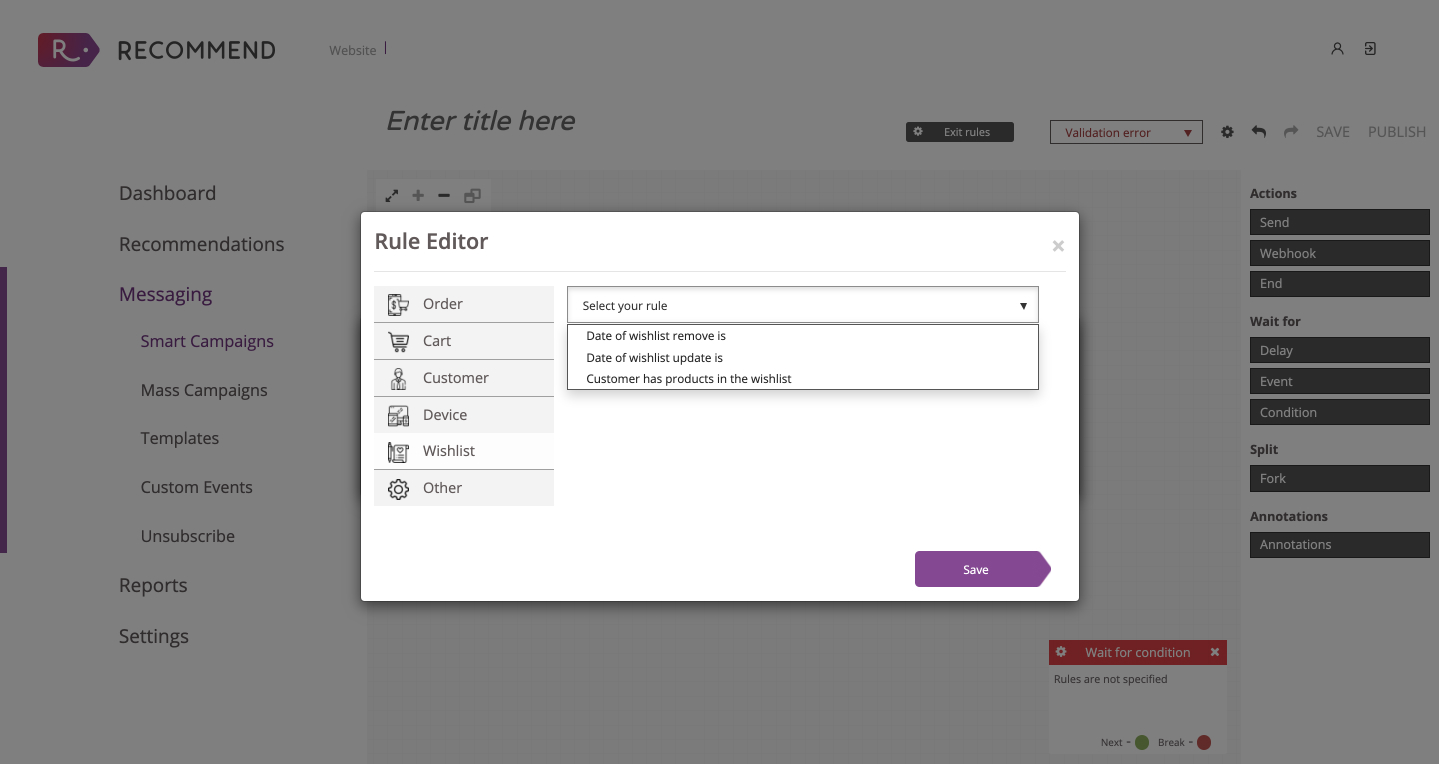
- Conditions: These are rules to apply to any event. These rules can be defined by:
- Order (date of last purchase, number of orders, etc.)
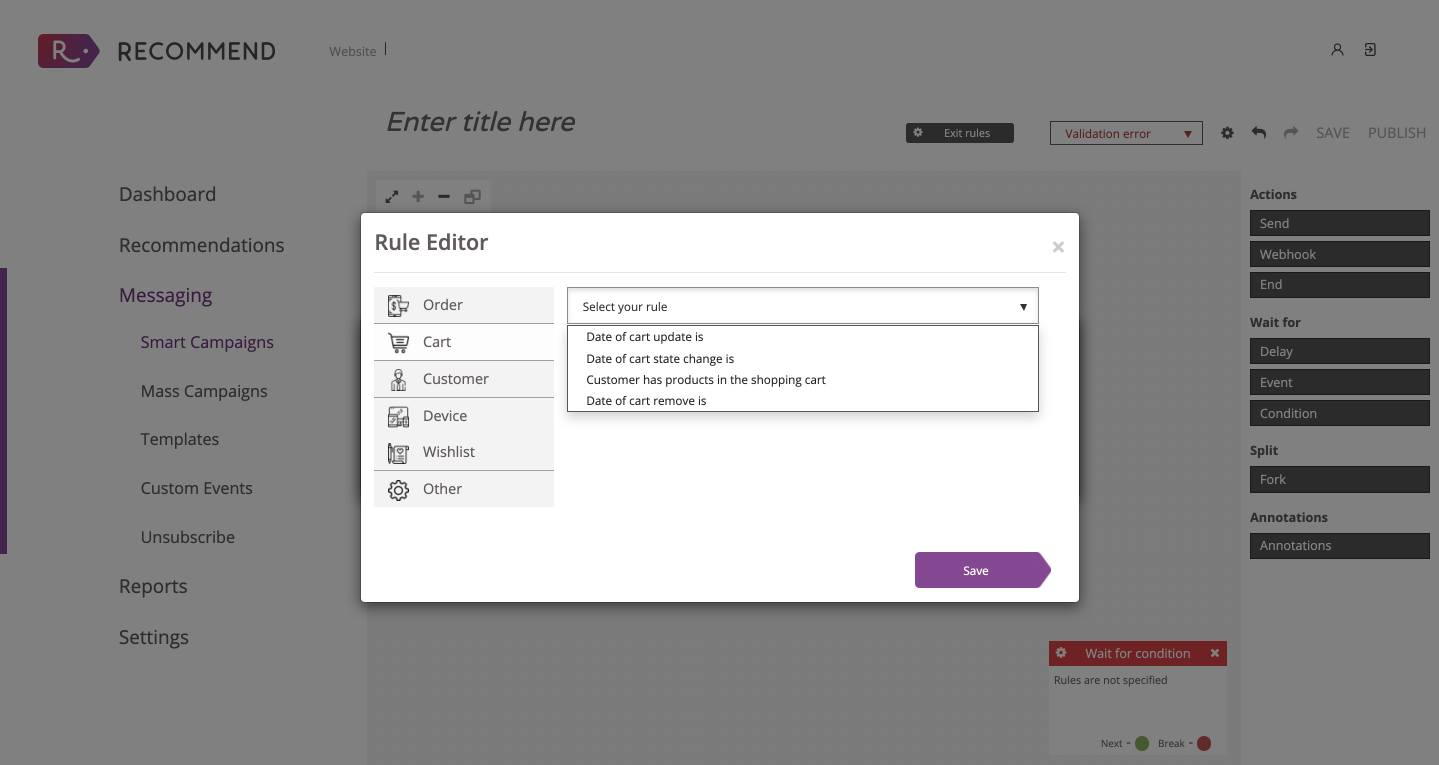
- Cart (customer has products in the shopping cart, the cart has been updated, etc.)
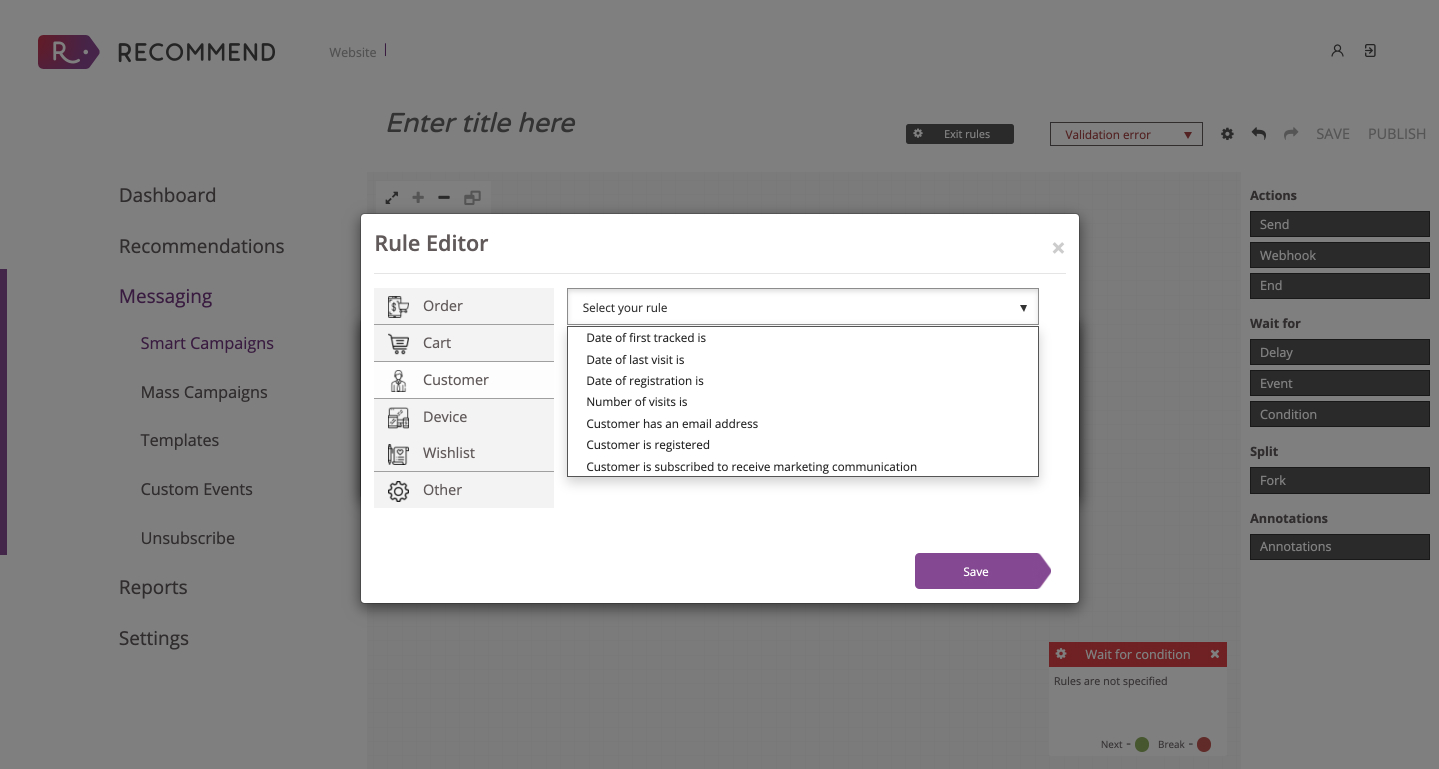
- Customer (last visit, if the customer is registered, etc.)
- Device (if the device can receive push notifications)

- Wishlist (has products in, is update), and other options that you can customise.
“Split” (Fork) is for adding more conditions to a specific event. For example, if a customer has accepted receiving a push notification, but another customer hasn’t, you can use the split option to differentiate both. This way you can indicate to your flow what to do in any of the cases.
“Annotations” are to add internal comments to your flow.
Custom Events
The last stop in our messaging journey is the custom events option. Here, you can create specific events, –based on your visitors’ interests and buying patterns–, to consider when you are creating your smart campaigns. The process is straightforward:

- Title: This is for internal use to identify your events. Don’t forget to add any term that refers to the event.
- Entity: You can choose from three different options: ‘Cart’, ‘Order’ and ‘Wishlist.’
- Event value: It’s the value that is transmitted from the website to determine the designated action performed.
You can create as many events as you want or need. After creating your events, you can find them in the list of events available when you are creating a new smart campaign.
Abandoned Cart Push Notification (Example)
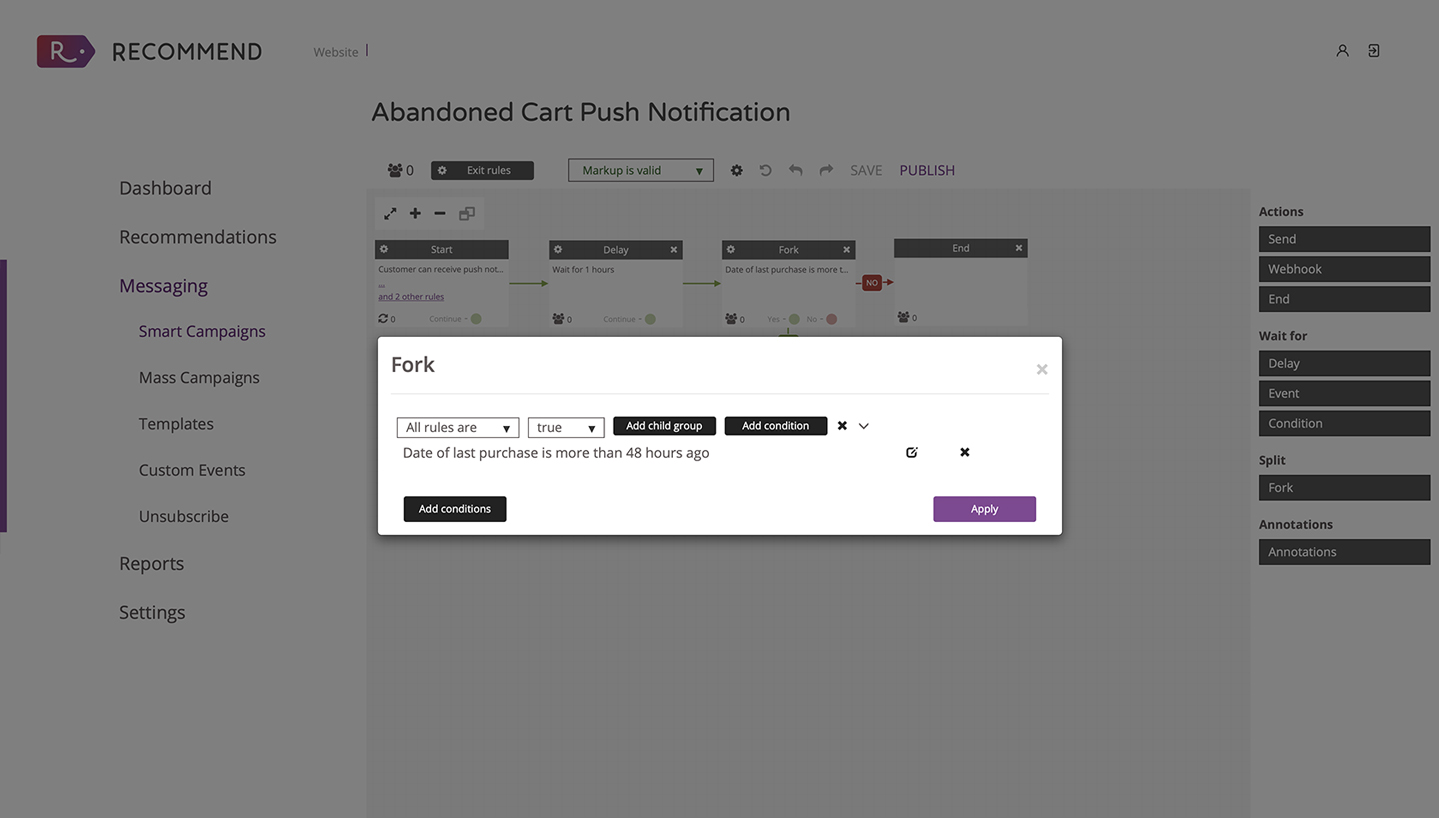
This is an example of a very simple flowchart to send a push notification after a customer abandons the shopping cart. The campaign includes three conditions. It has a one hour delay and a fork: date of last purchase, based on that condition the flow ends, or it triggers a push notification.
The conditions defined at the beginning of the flow are:
- Customer can receive push notifications
- It has some products in the shopping cart: You can edit this condition to indicate the number of products.
- Date of cart update is in the last 5 minutes.

The triggers for this campaign are three:
- Customer can receive push notifications (this means that a customer clicked “I agree to receive push notifications” on the website or in the application at least on one device),
- It has a specific amount of products in the shopping cart (not less than one), and
- The visitor has updated the cart in the last 5 minutes.
The delay is one (1) hour meaning that the platform needs to wait one hour to send the push notification. Besides, there’s a “Fork” that indicates if the campaign continues or end. In this case, is “Date of purchase is more than 48 hours ago”
The push notification is sent only if:
- The date is equal to the one defined within the flow
or
- If the date is different from the one specified within the flow, the platform doesn’t send the push notification, and the flow ends.
This is how the push notification looks:

In conclusion, you can create a campaign based on events and conditions to trigger your personalised communications. The flows can be as granular and specific as you need them to be. To be sure to have enough data to define your events and rules correctly and reach the right people at the right time.


